
I originally wrote a super clever (well, to me) intro to this post. But it was all about the 4th of July, and obviously I didn’t end up getting this published in time.
So let’s skip the intro, ok? We’re all just in it for the projects anyways.
This ring dish is so so easy to make—you don’t have to sculpt or anything, all you need is a jumbo cookie cutter and polymer clay!
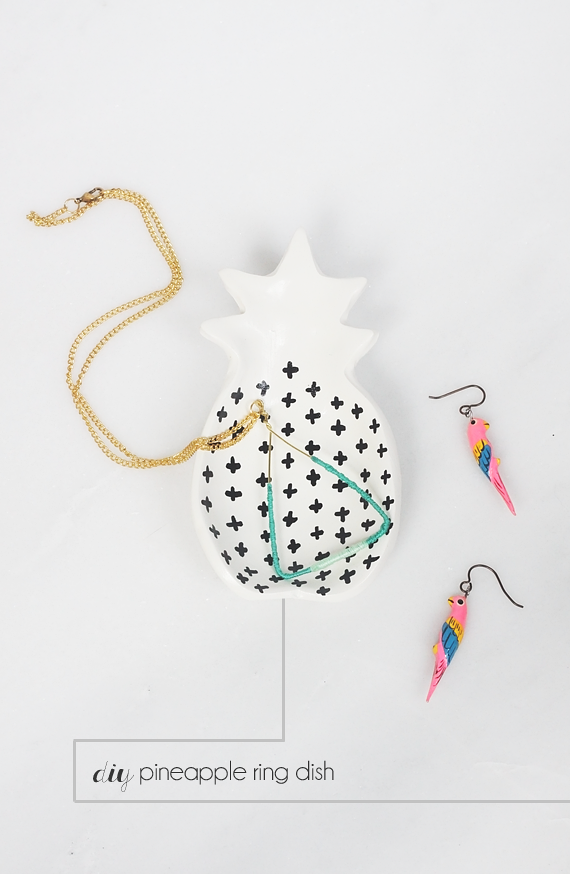
DIY Pineapple Ring Dish
Skill Level: Easy Peasy
Time: 1 hour-ish, plus drying time if you use paint
What You Need:
- 5″ pineapple cookie cutter*
- polymer clay* (6 oz. will make 2 ring dishes)
- butter knife or craft knife*
- rolling pin* (or use an empty beer bottle!)
- a little cup of water
- an oven!
- sandpaper* (optional)
- paint pens*
- spray paint* and painter’s tape* (optional)
Note: I used a big 1lb block of polymer clay since I knew I would be making multiple ring dishes, but if you want to make just one or two, 2 of those standard 3 oz. packs will be enough.
*Affiliate links. This means if you purchase, I will earn a small commission at no extra charge to you, which is pretty sweet because it helps me pay blogging bills, so thank you! I will only link to products I have used or would use myself, pinky promise!
What You Do:
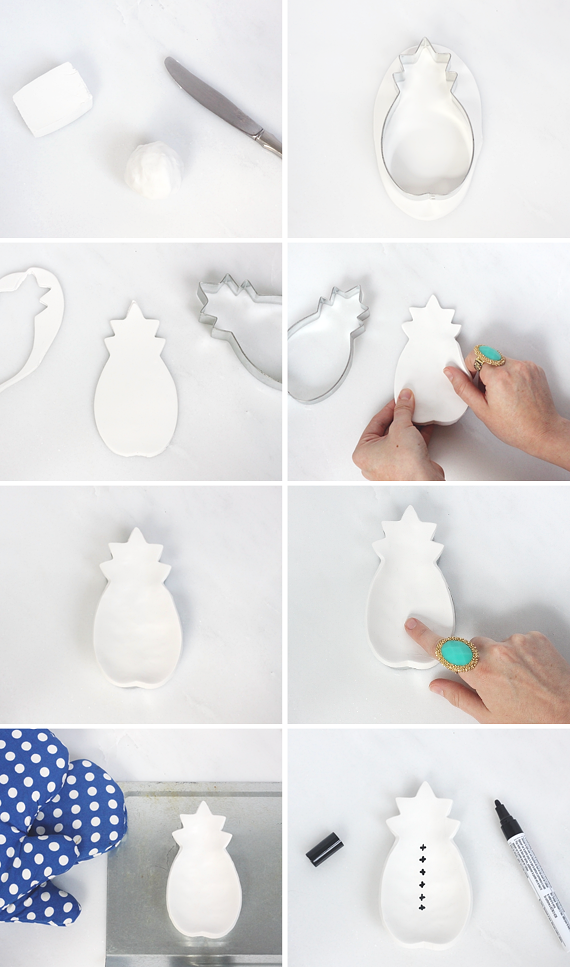
Step One – Cut off a chunk of clay and make a ball somewhere between the size of a plum and a tennis ball. Warm the clay in your hands and roll it around so it becomes easier to work with.
Step Two – Flatten the ball of clay into a pancake, then roll it out until it’s roughly 1/4″ thick and a little bigger than the cookie cutter. You can be all fancy with a crafting rolling pin if you want, but an empty beer bottle works just as well.
Step Three – Cut out the pineapple shape with the cookie cutter. Keep the clay scraps and any leftover clay sealed in a baggie to stay useable for up to a year. Go ahead and preheat your oven to the temperature on the clay package.
Step Four – Gently use your fingers to widen the clay pineapple enough so it will sit on top of the cookie cutter (the cookie cutter will be the “mold” for the bowl). The best way to do this is to start in the middle and pull the clay out towards the sides, being careful not to let it get too thin.
Step Five – Place the clay pineapple on top of the cookie cutter. Form a bowl or dish shape by pushing the middle down and molding the edges over the sides of the cookie cutter, so that the clay kind of hangs there and stays in place. You can make the bowl as deep or as shallow as you want. I didn’t photograph this step in a very illustrative way, so hopefully this description makes sense!
Step Six – Dip your finger in the cup of water and gently smooth out any bumps and fingerprints. Take your time with this step, as it’s much harder to remove them after the clay has been baked. But don’t go crazy either, perfection is overrated.
Step Seven – Bake the whole thing, cookie cutter and all, according to package directions (usually 15 minutes for every 1/4″ of thickness). If you have a toaster oven, this is the perfect time to use it! Once baked, remove from the oven and allow to cool. It will still feel a little soft when it’s warm, but will harden during cooling.
**Note: After being baked and cooled, the polymer clay will still be a wee bit flexible. Not enough that you could reshape it without breaking it, but just don’t be alarmed if it feels a little “bendy,” it’s supposed to be that way!
Step Eight – (optional, not pictured because clay dust and cameras don’t mix) Lightly sand the dish with fine grit sandpaper to smooth it out. You can skip this step if you want, I just had to make mine extra fancy-looking for the photos, ’cause I’m totally profesh.
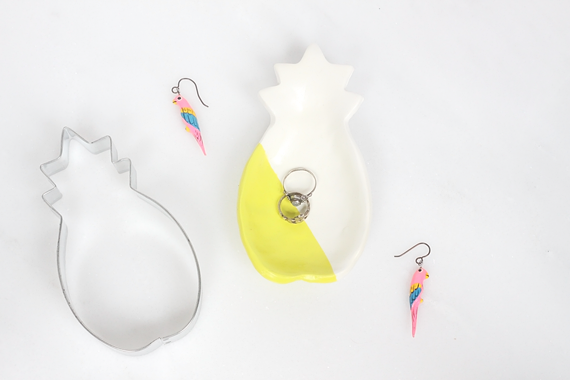
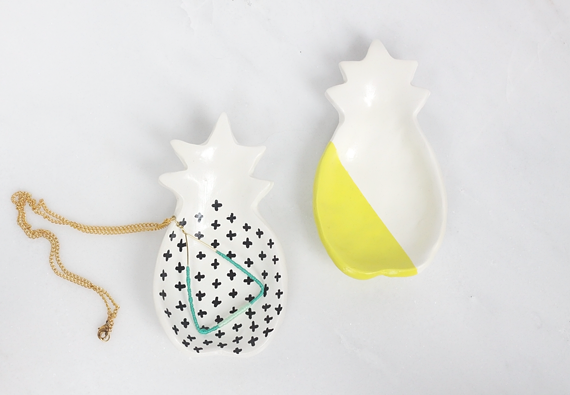
Step Nine – Decorate! I used spray paint and a paint pen to embellish my pineapples, then finished with a clear satin spray to give them a nice sheen. Clearly I adored Hello Lidy’s Swiss Cross Pineapple so much that I had to make my own! And how could I resist another chance to color-block something?
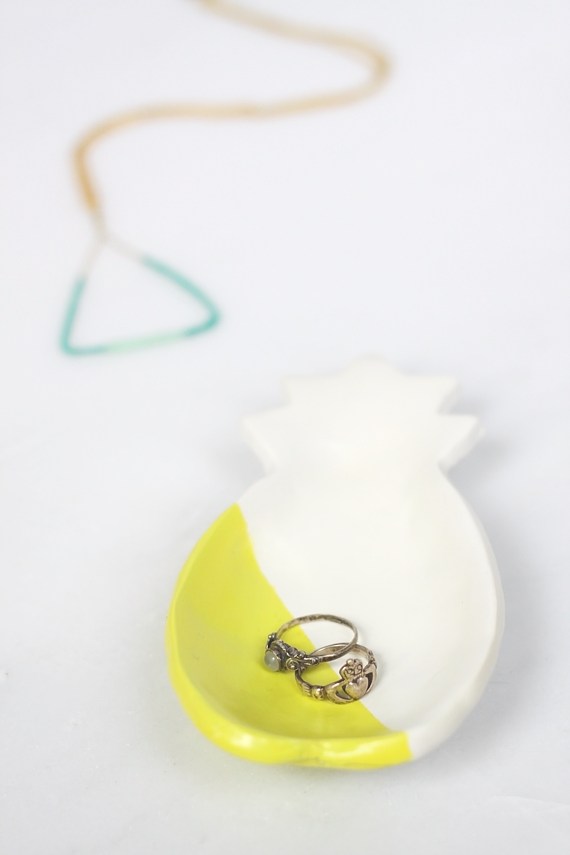
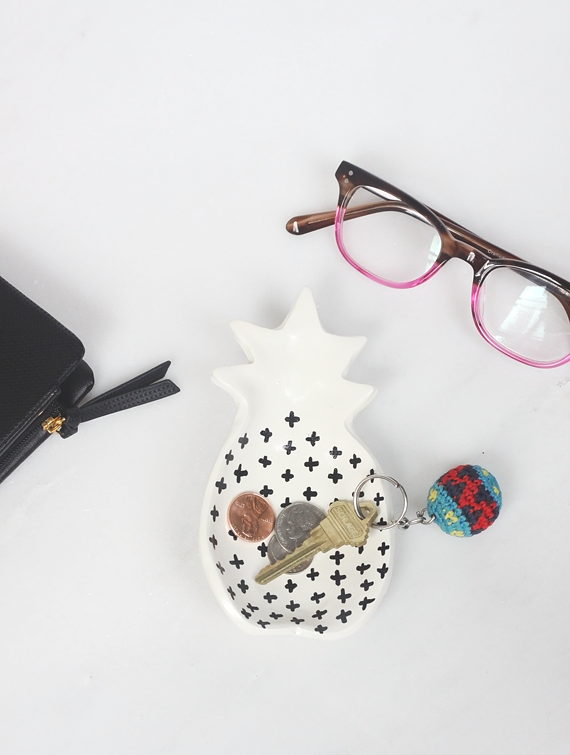
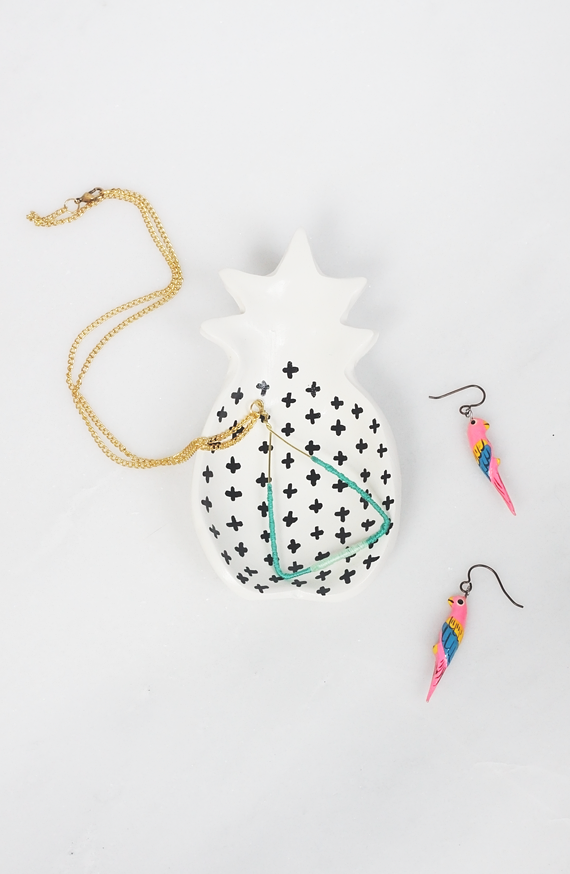
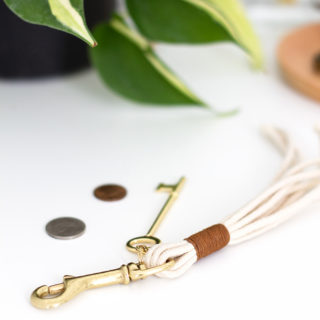
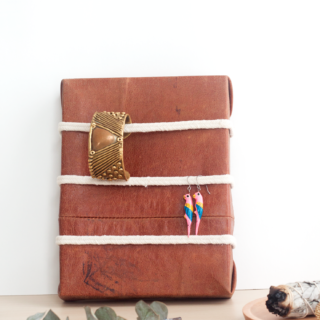
And that’s it! Toss some jewelry in there and display. It would also make a perfect coin/key catchall for your boyfriend to dump all his stuff in when he walks in the door (no more excuses, A.).
This pendant is a project too! DIY Color-Blocked Triangle Earrings
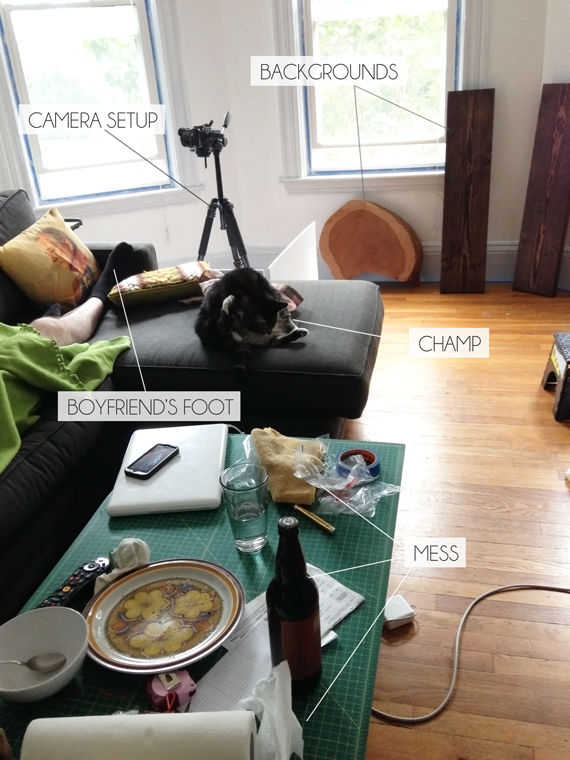
 And now for something a little different—my neighbor was curious the other day how I had space to make everything look so nice in my final project photos, so I thought it’d be fun to give you guys a peek behind the scenes. This is the chaos I bring into our home whenever I’m working on a project:
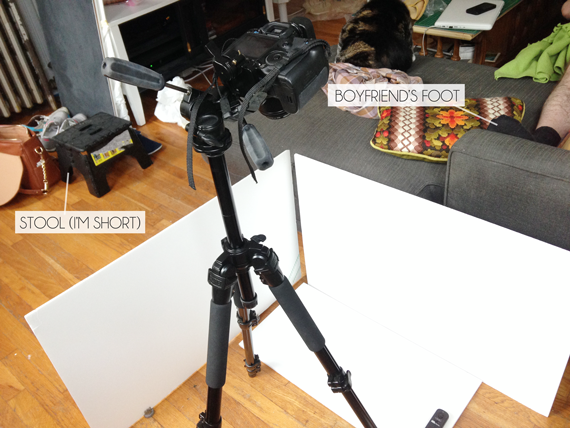
Cropping is a blogger’s best friend.
haha cropping is a bloggers best friend, so true! Love the project, I want to make one too!
Haha, glad you can empathize! Thank you, please do make it! I would love to see it on Instagram/Facebook/wherever if you do! 🙂
So cute! And the behind the scenes is too good! By the way, did you happen to turn one of your earring diys into a necklace?! If so, love that too 🙂
Thank you thank you! And yes, I did! My earring holes need to be re-pierced, so until I get that done it’s all necklaces for me! 🙂
Oh my word! These are incredible! Thanks for love, friend 🙂 You are a genius with the cookie cutter by the way.
XOXO
Aww, thanks Lidy! I couldn’t resist using the Swiss cross pattern, it looked so good on your pineapple! Also, I now want to use cookie cutters all the time! Xoxo
Good lord there’s such a thing as a 5″ pineapple cookie cutter. This is such an amazing idea.
Boyfriend’s foot can be cropped out, true! My boyfriend tends to block the light = no forgiveness.
Yes! There were some even bigger ones on Amazon, it’s crazy! Thanks for the love! Also, try cropping your boyfriend out by moving him to another room. 😉
This is so cute! I love pineapples so much at the moment, and this looks like something I’d love to try. I also like the behind the scenes shots!
Yay, thank you Emma! I’m totally on board with this trend too, obvs. You should totally make it, it’s so easy! And I’m glad my messy home can bring amusement to the internet. 🙂
This is sooooo good. I love that you used a cookie cutter!
Thanks, Alexis! xoxo 🙂
These are SO cute! And I just love the outtake shots – you had me giggling out loud on the bus on the way home 😀
Mission accomplished! 🙂
I love these, they’re super cute! and the behind the scenes pics as well 🙂
Aww, thanks Daria! I loved your watermelon coasters! xoxo
This is such an innovative idea! And the behind the scenes pics were hilarious!
I’d so do this if I had a pineapple shaped cutter 🙁
Thank you, that is so sweet! And you should totally buy the cookie cutter, it was only $6 on Amazon! I linked to it in the project materials. Do it! 🙂
Omg, this looked so hard, but I have almost everything in the house! And yes, haha, cropping is a blogger’s best friend! (sorry, for the bad english)
It’s not hard it’s easy easy! 🙂 Thank you for stopping by!
This is adorable!! Love the pineapple and the behind the scenes look- haha! I usually have a baby hand somewhere… prob a bit cuter than a foot (no offense to boyfriend of course!)
No worries, boyfriend’s foot realizes it can’t compete with a baby hand. 🙂 Thank you, Laurel! xoxo
1. This idea is so stinking cute. I LOVE it!
2. Must find a pineapple shaped cookie cutter immediately so I can make pineapple shaped EVERYTHING.
3. LOVE your behind the scenes photos. Sometimes when I take food photos I laugh about how I’ve managed to clear a 2×2 foot space for photos but the rest of my kitchen is a nightmare! Cropping is totally a blogger’s best friend!
XOXO
Becca | Ladyface Blog
Thank you Becca! Amazon has MANY pineapple-shaped cookie cutters, you will go bananas when you see! And I’m so glad and amused at how the behind-the-scenes shots have resonated with other bloggers…if our readers only knew how disastrous our homes really were, haha! xoxo
These are adorable! I ordered the supplies and I’m going to make this dish for my bestie, who loves pineapples. And I got extra clay so I can make one for myself too 🙂 thanks for sharing!!
That’s awesome! Have fun making them! I would LOVE to see a pic! Hashtag #myjadeandfern on Instagram or send it to my Facebook page if you get a chance. xoxo
Found your site on the Maker’s linky and 1. love it. 2. pinning & making these pineapples as a nod to Psych. 3. LOVE that you showed your behind the scenes!! <3 Great post!
Yay, thank you! I hope you do make them, they’re so fun! xoxo
These are amazing. Do you mind if I share these with a few other pineapple themed tutorials on my blog? http://www.herenorthere.ca is the blog! Thanks!
Thank you, Hailey! And not at all, I’d be honored–thanks for asking! xoxo
When I initially commented I clicked the “Notify me when new comments are added” checkbox and now each time a comment is added I
get several e-mails with the same comment. Is there
any way you can remove people from that service? Cheers!
Thanks for letting me know you were having trouble with this, and sorry for the bombardment–this has been a popular post! 🙂 I’ve removed your email address from the subscription. Let me know if for whatever reason it doesn’t work. Cheers!
lol I love the way you showed us your room with the funny tags ‘boyfriends foot’ ‘mess’ etc very funny 🙂 great dishes too !
Glad you enjoyed it! 🙂 Thanks for visiting!
That is adorable. I have several large cookie cutters. These would be a perfect gift for office mates. What type of paint, other than you mentioned paint pens and spray paint, did you use? anything specific? did you seal them with a spray (matte or glossy) in anyway?
Thank you so much! The baked clay is really versatile as far as paint goes. I used Rustoleum spray paint because I had it on hand and spray paint dries so fast. The paint pens were oil-based paint pens that I picked up at my local craft store. I believe the Sharpie brand makes ones you can buy online. But feel free to use any kind of craft paint you have handy! I did seal my dishes with a clear satin spray paint–again, any brand should really be fine. Hope that helps!
Love this idea. .. think I’m going to get a snowman cookie cutter and use it for Christmas as gifts and add a small bar of soap so they can use it as a soap dish for the season. .. this idea will come in handy for any season. .. thanks for the inspiration. …
What a cute idea! If you make them, I would love to see! You could send me an FB message or upload it and share the link in this comment thread. Thanks for your kind words! 🙂
I really loved this idea! Especially as a thrifty crafter!
I went and got the poymer clay and used a star shape for my bowl.
I was wondering if the bowl is supposed to become rock hard or stay a little flexible. My bowl was baked for the right amount of time (and I even put it in again) and it dried in the correct form, but it had a slight flexibility to it. The bowl doesn’t move tooooo much, but it is a little flexibile.
Is this expected? Or in other words….what did I do wrong?
Thanks so much! Loved doing it!
Chelsea – yay! I’m so glad you liked and MADE the project! That’s the best compliment a DIY blogger can get. 🙂
To answer your question, yes, when polymer clay has been baked it still remains a tiny bit flexible. You did everything right! Sorry I didn’t mention it in the tutorial; I am updating that now!
Thanks a million! xoxo
Awesome! Thank you so much for letting me know! I am going to make more (now and forever) because it was so easy to do. You were right!
I’m going to take photos of my next one it and link your tutorial on my little craft blog on Tumblr, Chelseascrap.
Thanks again for the fun and awesome craft idea!
Awesome, please send me the link when you do that! So glad again you enjoyed the project, and thanks for reaching out! Happy holidays!
Hello Marlene,
I made the pineapple dish.. and it came out awesome . However, I used Krylon satin clear
Spray on it. It has been about 11 hours and it still feels a little sticky. What kind of clear spray
Did you use? Also can I salvage my dish or did I ruin it. Thankyou
Cory
Hi Cory! Thanks so much for making the project, I LOVE hearing that! If you’re having trouble with the spray paint staying tacky, it could be that you initially sprayed too thick a coat, or that it was too humid, or too cold. Spray paint can be a bit finicky, I’m afraid! I used Krylon satin clear for this project as well—it worked fine in this case, but I’ve had trouble with it for other projects.
I think you can definitely salvage the dish, don’t give up hope! I would try using a very fine sandpaper (180 or finer), and GENTLY sand the surface to just get rid of the outer layer of spray paint. Dust the piece off well and then try spraying again. Use extremely light coats, think of “dusting” it with just a breath of paint, and let it dry about 15 minutes between each coat. Make sure you’re spraying in an environment that meets the temperature/humidity restrictions on the spray paint bottle. After the final coat, let it dry 24 hours and see how it goes.
I hope that helps, let me know how it works out! Good luck!
xoxo
I love your sense of humor. It comes across really well in your writing. And amen to sharing the mess behind the scenes. I like to do that too. So, so much mess.
Oh gosh, thank you so so much! And YES to messes. Right now my floor is covered in greenery trimmings. (Worth it). Thanks for visiting! xoxo
Hi! I’m a little late to the game and just stumbled across this fun project! I had a little trouble with step 5- any tips for keeping the edges sharp and clean while stretching the clay and forming the bowl? Also, my dish seems a little unbalanced- more “top heavy.” I’m guess I need to work on my bowl shape! Thanks for the fun craft idea!!
Hi Jen, thank you so much for reaching out! It’s so fun to know that someone is out there making this project. 🙂 So, when you’re working with the clay, if your hands get too warm, the clay will get softer and it can be hard to form crisp shapes and edges. If this happens, try rolling it up again, then let it rest for a bit so it firms back up. Maybe run your hands under cold water. Then, roll it out again, cut out the shape, and try to mold it again. You can also use a tiny TINY drop of water to smooth out the shape with your fingertip. For shaping the bowl without it being “top heavy,” try to make the depth of the bowl even from the top of the pineapple to the bottom. This means using your thumb or fingers to push the clay down and inward in the center line of the bowl. (This is hard to describe, I hope it’s making sense!) You can flip it over to check, and see if it’s balanced when you set the bowl down. I hope that helps. Let me know if you have any more questions, you can also shoot me an email or message me on Instagram. Have fun, and I hope you share it with me when you’re finished! Happy making! xx
hello! love this diy! cant wait to make it 😊
can you pls share if you prefer a particular polymer clay brand to use over another?
i have used only premo sculpey for much smaller jewelry pieces but haven’t made anything as large as this and would love to! thanks for sharing this diy!
That’s so sweet of you to say, thank you! I know I’m late to your question, but if you’re still curious, I’ve had great luck with store brands of polymer clay! Gotta save where you can, right? 🙂